Sunday, September 14, 2014

I Mater cake!!


It was my nephews birthday party today, and I heard he wanted a Tow Mater cake - so last night I made one for him. My research starter really bad - my skill levels are no-where near a 3D, fondant covered, accurate model of a tow truck! And I couldn't seem to find any 'flat' cakes. But I did find this mater cookie on pinterest that I used as my inspiration:
Tow Mater Cookie

I'm pretty happy with my first solo cake! So here are my steps (photos only) for anyone else who wants to copy.

I used a double quantity of a 'standard' cake size, and cooked it in my Chefs Toolbox Saute Pan which has a 28cm diameter.

Made a template, and 'stuck' it to the cake with toothpicks. I changed the shape a little so I didn't waste too much cake - there was hardly any left over/wasted.

Cut out the cake. (Ate some of the off cuts, lucky I left some though - notice something missing?):

Iced it with butter cream (chocolate), mixed a small amount of the chocolate icing with a bit of blue colouring gel and used that for rust/dirt:

Used fondant (from Aldi) for most of the details. The tyres were covered in black, some outlining and the mouth in black, and then the eyes/windshield and teeth in white. It looked like something was missing, so I added the wing mirrors, and some chocolate fingers for more detail.

Glad this wasn't a pinfail!
It was a hit at the party. I'm racking up those 'best aunty' points!!

Tuesday, August 19, 2014

Eye Piece - Steampunk Accessory

Of Course if you are going steampunk, then you need a few accessories. Here is my first:
monocle, mechanical, victorian, leftleg, gears
I used a part of a lense for the base of the eye piece - it still spins around. One of the gears is mounted on the inside ring, so it moves around. The gears and 'things' are from the inside of an old clock that I pulled apart a while ago. The (fake) leather pieces were from a belt. And the fancy fasteners on the side (a bit like a hook and eye) were the only things bought (although not for this, I got them because I liked them and thought they were a bit 'steampunky'!). Elastic cord is threaded through the ends of the fasteners.
Outfit is starting to come together, just a few more accessories to go!

Steampunk cage skirt

Still on the Steampunk theme...
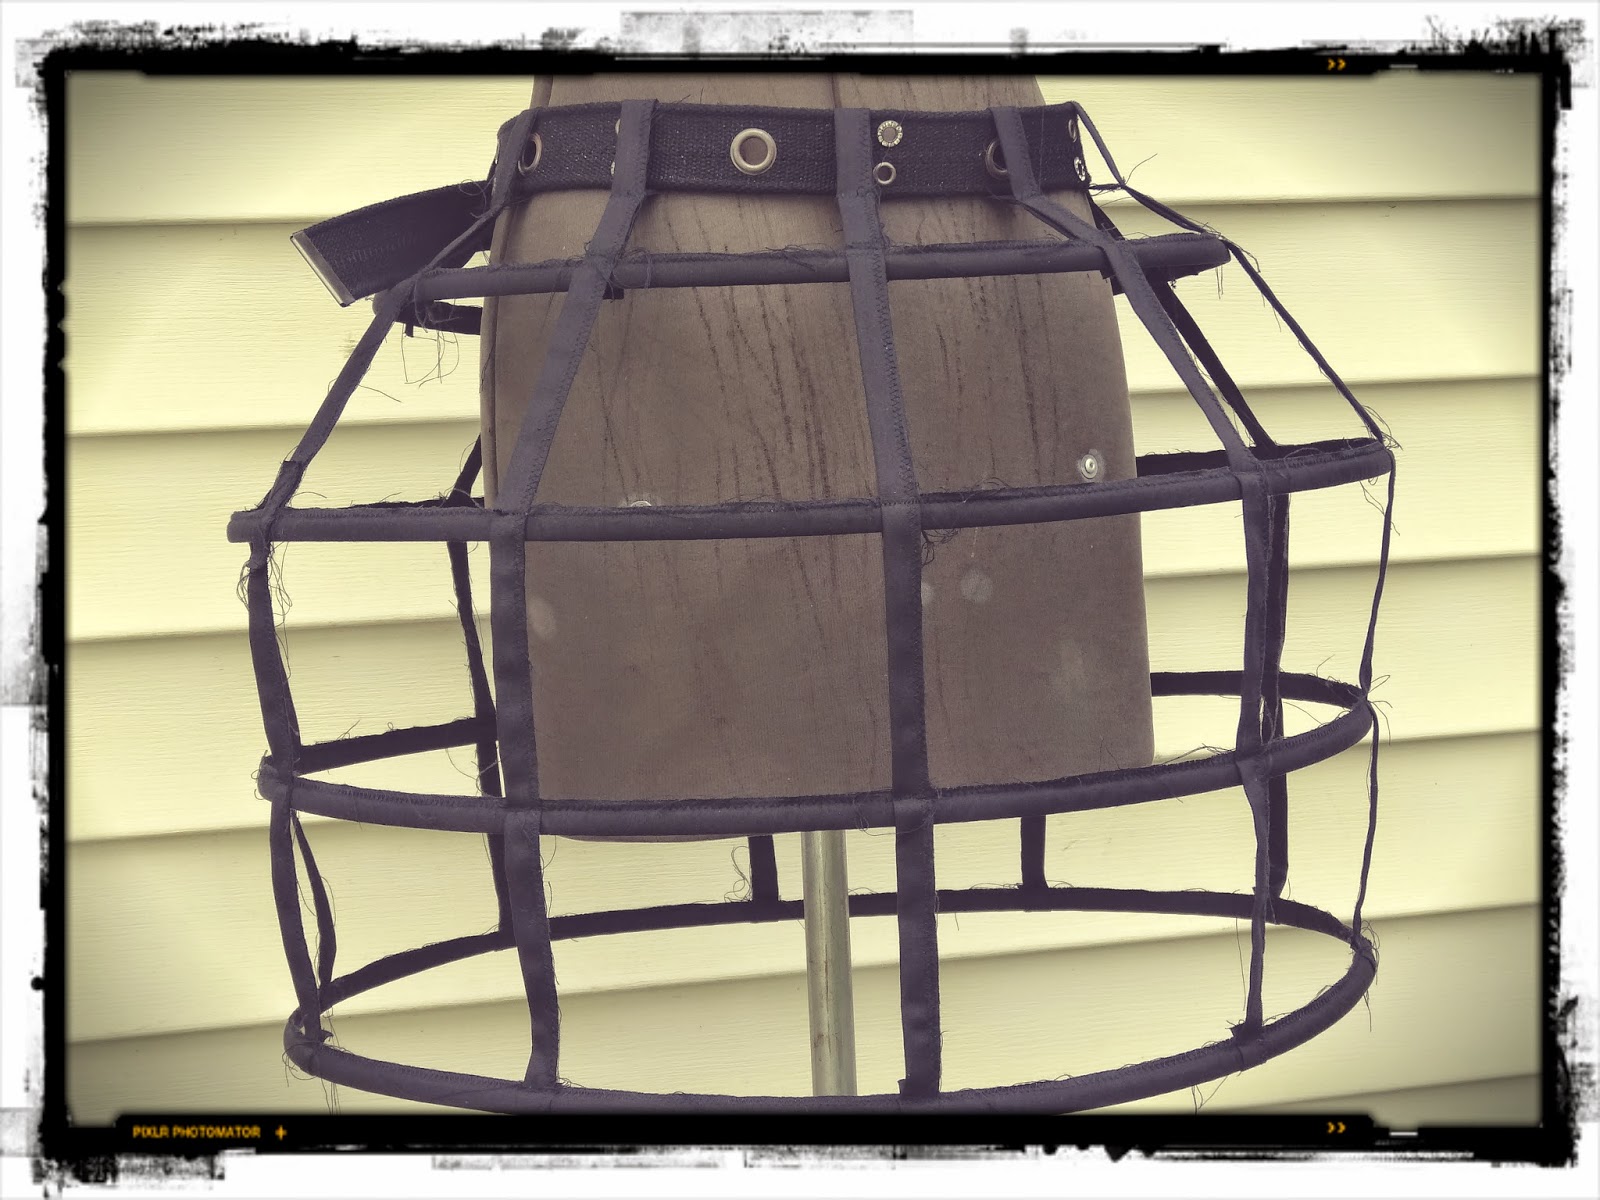
Felt like making a cage skirt - so here it is:

goth, black, boned skirt, victorian, cosplay, leftleg
goth, black, victorian, boned skirt, cosplay, leftleg

I've gone the 'grungy' look - leaving raw edges and long threads. I didn't have any bias tape on hand, but had a heap of straight cut tape, which I folded in half and sewed (zigzag) down the side (hence the raw edges). I inserted a double layer of boning (just the poly boning, sew-in type) - I was worried that just one layer would not be strong enough to hold the structure. Bottom 3 rows are all the same size, top row a bit smaller. I finished the top edges with a loop - here I have inserted a belt, but you could use elastic and stitch the loops in place.

Tuesday, August 5, 2014

Purple Tulle Bustle skirt/pad - Steampunk instructions / tutorial

So I'm really keen on making a steampunk outfit. I love the Victorian look, and have made a corset (more about that later). But for my first steampunk post, here is my purple tulle bustle skirt / bustle pad.
victorian, bustle pad, leftleg, cosplayvictorian, bustle pad, leftleg, cosplay

And a photo to show what it will look like under a corset:

victorian, bustle pad, leftleg, cosplay, tutorial, instructions, diy

I made this to go under another bustle skirt to give it some extra poof at the back. But also looks quite good by itself. Also looks pretty good for a small kids skirt too!


DETAILS:
There are 5 layers of tulle. Each one about 36-40" long, either gathered or pleated down to onto a waist band about 14" long. I would recommend big pleats - easier to do than gathering (less steps) - and do rough gathers, don't bother measuring, just go by eye. Maybe pleat one layer one way, the next layer the oppposite way, and repeat. (If I do another I will do it that way.)
The layers are 14", 12", 10", 8" and 6" wide (bottom to top), with the bottom corners cut on a smooth curve.
To make up, add tape over bottom edge to all layers first (could use lace instead). I used some fabric strip I picked up somewhere very cheaply, it wasn't cut on the bias, so it didn't go around the curves perfectly. But we are after the effect here (and I wanted cheap too), so you would never know if I didn't tell you, unless you looked really closely!
Then gather / pleat the layers, one by one, onto a strip that is about 15" wide. I found it easier to pin the first 3 layers and stitch these down. Then pin the next two layers and stitch again.
Add this onto a tape/band for the waist. I have added it onto a long strip so I can tie it at the front. But you could make a waist band that is the right size for you and add to that. When stitching the band on sandwich the tulle between the waist band and the original 15" strip. This gives a neater finish (and less scratchy if it happens to be against your skin).

And here's a pdf summary of the instructions for you to make your own! INSTRUCTIONS HERE

Tuesday, July 29, 2014

Some art works for the wall - in yarn!

It's been a long time since I've posted anything on my blog. So here I am to break the silence with something I am really proud of, and hope you love it too.

"Cell Structure" - crochet cotton and resin - 250 x 600mm
I wanted to do something with resin for this project. And I was inspired by microscopic photos of cell structures. This took a little experimenting. My first attempt I didn't like, and put down somewhere. A few weeks later I rediscovered it and decided it did have potential. This is the end result.


"Colony in Red" - mixed yarns, crochet, on plywood - 340 x 1000mm
You may remember "red barnacles" which was done in a reclaimed frame. I received many comments about the frame. So this time I decided to try them in an organic shape. I was inspired here by barnacle shells crammed into a crack at sea side rock pools.

I have entered both of these into the NSW arts and crafts society's 2014 Emerging Artist - Craft Award (find here). Good luck to anyone else that enters!